
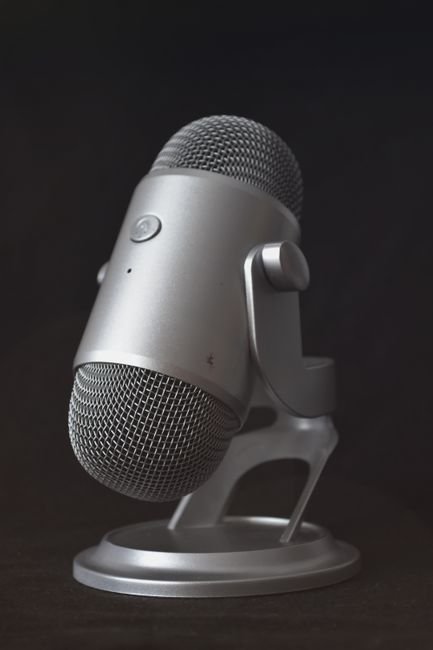
Get Heard: High-Quality Condenser Microphones for YouTube Success
In the competitive landscape of YouTube, where content quality reigns supreme, audio fidelity is no longer an afterthought but a cornerstone of viewer engagement. While captivating visuals and compelling narratives draw viewers in, subpar audio can quickly drive them away. This is where high-quality condenser microphones become indispensable tools for aspiring and established YouTubers alike. Moving beyond the built-in microphones of cameras and smartphones, a dedicated condenser mic elevates your sound, transforming amateur recordings into professional-grade productions.
Condenser microphones, at their core, operate by using a diaphragm that vibrates when struck by sound waves, altering the capacitance between the diaphragm and a fixed backplate. This process, requiring phantom power (typically 48V), results in a more sensitive and detailed audio capture compared to their dynamic counterparts. For YouTubers, this translates to a richer, more nuanced vocal presence, clearer instrument reproduction, and an overall more immersive listening experience for your audience. The subtle nuances in your voice, the delicate strum of a guitar, or the ambient sounds of your recording environment can all be captured with remarkable accuracy by a good condenser.
The benefits of investing in a quality condenser microphone for your YouTube channel are multifaceted. Firstly, professionalism. Crisp, clear audio instantly signals to viewers that you take your content seriously. This builds trust and credibility, encouraging longer watch times and higher subscriber retention. Imagine listening to a captivating tutorial with static, background hum, and muffled speech – the message is lost, and the presenter appears unprofessional. Now, contrast that with a clear, present vocal with minimal distractions; the information is easily absorbed, and the presenter is perceived as knowledgeable.
Secondly, audience engagement. When viewers can clearly understand every word you say, they are more likely to remain engaged with your content. This is particularly crucial for spoken-word content like vlogs, reviews, tutorials, and podcasts. Condenser microphones excel at capturing the natural warmth and inflection of the human voice, making your delivery more engaging and personable. Furthermore, for musicians and podcasters, the ability to capture the full dynamic range and subtle textures of instruments and voices is paramount for creating a truly impactful audio experience.
Thirdly, brand building. Your audio is an integral part of your brand identity. Consistent, high-quality audio reinforces your brand’s professionalism and sophistication. Over time, viewers will associate your channel with excellent sound, further solidifying your reputation. Think of popular YouTubers known for their distinct audio signatures – it’s a recognizable hallmark of their brand.
When selecting a condenser microphone for YouTube, several key factors come into play. Polar Patterns are crucial. The most common for solo YouTubers are cardioid, which picks up sound primarily from the front, rejecting noise from the sides and rear. This is ideal for isolating your voice in a less-than-perfect recording space. Omnidirectional microphones capture sound equally from all directions, useful for capturing room ambiance or multiple speakers in close proximity, but generally less ideal for isolating a single voice. Bidirectional (figure-8) patterns capture sound from the front and rear, useful for interviews with two people facing each other, but less common for solo YouTube work.
Diaphragm Size is another important consideration. Large-diaphragm condensers (typically 1 inch or larger) generally offer a warmer, richer sound with greater sensitivity and a wider dynamic range, making them excellent for vocals. Small-diaphragm condensers are often more accurate and have a flatter frequency response, making them ideal for capturing instruments with precision. For most YouTubers focusing on voiceover and general content creation, a large-diaphragm condenser is often the preferred choice.
Frequency Response dictates the range of frequencies a microphone can capture. A flat frequency response indicates that the microphone reproduces all frequencies equally, resulting in a natural and accurate sound. However, some microphones have tailored frequency responses that can enhance certain aspects, like boosting vocal presence in the mid-range. Understanding your content needs will help you choose a microphone with an appropriate frequency response.
Sensitivity refers to how much output signal a microphone produces for a given sound pressure level. Higher sensitivity means the microphone can pick up quieter sounds and nuances, which is desirable for capturing subtle vocal details. However, extremely high sensitivity can also lead to picking up more ambient noise.
Self-Noise is the inherent noise the microphone produces when no sound is present. Lower self-noise is always better, as it ensures a cleaner signal, especially when recording in quieter environments or when amplifying quiet passages. Look for microphones with a self-noise rating below 15 dBA.
For YouTubers, two primary categories of condenser microphones stand out: USB Condenser Microphones and XLR Condenser Microphones.
USB Condenser Microphones offer unparalleled ease of use and are an excellent entry point for beginners. They connect directly to your computer via a USB cable, eliminating the need for external audio interfaces or mixers. Many USB mics also feature built-in headphone jacks for direct monitoring, allowing you to hear your audio in real-time without latency. They are often more affordable and require no additional setup beyond plugging them in. Popular choices include the Blue Yeti, Rode NT-USB+, and Audio-Technica AT2020 USB+. These microphones are incredibly versatile, suitable for vlogging, podcasting, voiceovers, and even basic music recording.
Rode NT-USB+: This microphone boasts a high-quality capsule, a tight cardioid polar pattern, and a headphone output for zero-latency monitoring. It delivers a clear, present sound that is well-suited for spoken word and vocals. The included pop filter and stand mount make it a complete package for aspiring YouTubers. Its robust build quality and excellent sound reproduction have made it a favorite in the creator community.
Blue Yeti: A long-standing favorite, the Yeti offers selectable polar patterns (cardioid, bidirectional, omnidirectional, and stereo), making it incredibly versatile for various recording scenarios. Its plug-and-play functionality and integrated controls for gain and headphone volume contribute to its user-friendliness. While its sound quality is good for its price point, some audio purists might find it slightly less refined than dedicated XLR setups.
Audio-Technica AT2020 USB+: Building on the success of its XLR counterpart, this USB version provides a warm, natural sound with excellent clarity. It’s a great option for those seeking a more studio-like sound without the complexities of an XLR setup. The included headphone jack with volume control is a convenient addition.
XLR Condenser Microphones, on the other hand, offer superior sound quality, flexibility, and a more professional workflow. They require an audio interface or a mixer to connect to your computer, as they need phantom power and signal conversion. While this adds an extra layer of complexity and cost, the sonic benefits are often significant. XLR mics provide a cleaner, more detailed signal path, allowing for greater control over your audio during post-production. They are the industry standard for professional audio recording and are often the choice for YouTubers who prioritize the absolute best sound quality.
Rode NT-USB Mini (XLR version): While the USB version is popular, Rode also offers an XLR version of the NT-USB Mini which provides excellent value and professional-grade sound. It’s a compact and versatile microphone that excels in capturing clear vocals.
Audio-Technica AT2020 (XLR): This is a highly regarded entry-level XLR condenser microphone that offers exceptional value for its price. It delivers a clear, articulate sound with a balanced frequency response, making it a fantastic choice for voiceovers, vocals, and acoustic instruments. Its robust construction ensures durability.
Shure SM7B (Dynamic, but often compared): While technically a dynamic microphone, the Shure SM7B is so popular for voiceovers and broadcast that it warrants mention as a benchmark for vocal clarity and warmth, often outperforming many condensers in specific vocal applications due to its inherent ability to reject background noise. However, for capturing the full detail and nuance of instruments or softer vocal performances, a condenser is usually preferred.
The choice between USB and XLR ultimately depends on your budget, technical comfort level, and audio quality aspirations. For most new YouTubers, a high-quality USB condenser microphone offers the perfect balance of performance and ease of use. As your channel grows and your audio demands increase, you might consider transitioning to an XLR setup.
Beyond the microphone itself, accessories play a vital role in optimizing your audio. A pop filter or windscreen is essential for reducing plosives (harsh “p” and “b” sounds) that can overload the microphone capsule and create an unpleasant distortion. A shock mount is crucial for isolating the microphone from vibrations transmitted through your desk or stand, preventing unwanted rumble from entering your recording. A sturdy microphone stand (desk or boom arm) ensures proper microphone placement and stability.
Acoustic treatment of your recording space is equally important. Even the best microphone will struggle in a room with excessive echo and reverberation. Simple solutions like acoustic foam panels, bass traps, or even thick blankets and curtains can significantly improve the acoustics of your recording environment, resulting in a much cleaner and more professional-sounding recording.
When it comes to recording techniques, proximity effect is something to be aware of with condenser microphones. This phenomenon causes a bass boost as you get closer to the microphone. Experiment with your microphone placement to find the sweet spot that provides a present vocal without an overly boomy sound.
Gain staging is critical. Set your microphone’s gain (input level) appropriately to avoid clipping (distortion from exceeding the maximum input level) while still capturing a strong signal. Aim for your audio levels to peak around –