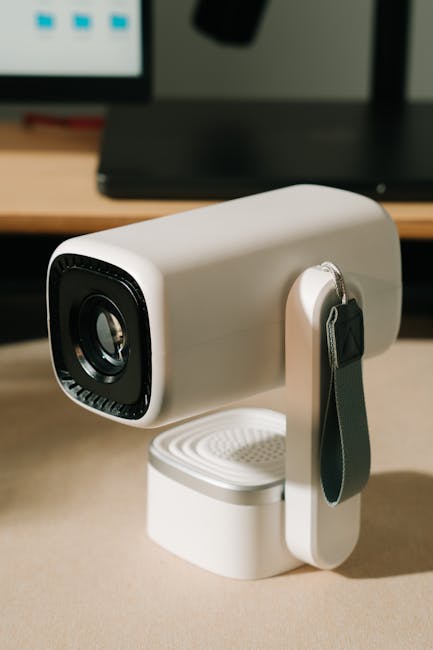
The advent of mini projectors has revolutionized portable entertainment and on-the-go business presentations. Their compact size and affordability make them incredibly accessible, but a common challenge arises: achieving a perfectly rectangular image when the projector isn’t perfectly aligned with the screen. This is where keystone correction becomes an indispensable feature, ensuring your visuals are always sharp, distortion-free, and professional.
Understanding the Keystone Effect:
Imagine placing your mini projector on a table, angled upwards to project onto a wall. The light rays diverge, causing the top of the projected image to be wider than the bottom, creating a trapezoidal shape. This distortion is known as the keystone effect, named after the architectural stone used to support arches. Conversely, if the projector is angled downwards, the bottom will be wider than the top. This optical illusion not only looks unprofessional but can also make text illegible and images appear skewed, detracting significantly from the impact of your presentation or movie.
The Power of Keystone Correction:
Keystone correction is a digital or optical process that counteracts the keystone effect by digitally adjusting the image geometry. It essentially “squashes” or “stretches” specific portions of the projected image to compensate for the angle of projection. This process effectively transforms the distorted trapezoid back into a perfect rectangle, aligning it precisely with your screen or wall.
Types of Keystone Correction:
Mini projectors typically employ one of two primary methods for keystone correction:
- Digital Keystone Correction: This is the most common type found in mini projectors. The projector’s internal processor digitally manipulates the image data before it’s sent to the lens. It’s highly effective and readily adjustable via the projector’s menu or dedicated buttons. The advantage lies in its flexibility and ease of use. However, it’s important to note that aggressive digital keystone correction can sometimes lead to a slight reduction in image sharpness or resolution as pixels are stretched or compressed.
- Optical Keystone Correction (Less Common in Mini Projectors): This method involves physically adjusting the projector lens or mirrors to alter the light path. While it generally preserves image quality better than digital correction, it’s a more complex and expensive mechanism, making it less prevalent in the budget-friendly mini projector market. Some higher-end portable projectors might incorporate a limited form of optical adjustment.
How to Utilize Keystone Correction for Optimal Results:
Mastering keystone correction is straightforward and crucial for achieving those perfect presentations. Here’s a step-by-step guide:
- Initial Placement: Position your mini projector as close to being perpendicular to your screen or wall as possible. The less extreme the angle, the less correction will be needed, and the better your image quality will remain. Aim for a level surface and ensure the projector is stable.
- Power On and Project: Turn on your mini projector and begin projecting your desired content. Observe the projected image on the screen.
- Identify Distortion: Note if the image appears as a trapezoid (wider at the top or bottom) or if it’s skewed.
- Access Keystone Settings: Locate the keystone correction menu on your mini projector. This is typically found within the “Picture,” “Display,” or “Settings” options of the projector’s on-screen display (OSD) menu. Many mini projectors also have dedicated buttons on the unit or remote for quick adjustments.
- Adjust Vertically: If the top of your image is wider than the bottom (projector angled upwards), you’ll need to apply vertical keystone correction. Look for options like “Vertical Keystone,” “V-Keystone,” or similar. Use the directional buttons or slider to adjust the image until the top and bottom edges are parallel.
- Adjust Horizontally (If Applicable): Some mini projectors also offer horizontal keystone correction. This is useful if your projector is placed off-center to the screen, causing the sides to be uneven. Similar to vertical adjustment, find the “Horizontal Keystone” or “H-Keystone” setting and make the necessary adjustments.
- Fine-Tuning: Once the primary adjustments are made, zoom in on the corners of your image. You may need to make minor fine-tuning adjustments to ensure all corners are perfectly aligned and the image forms a true rectangle.
- Focus Adjustment: After achieving the desired keystone correction, remember to adjust the projector’s focus to ensure the entire image is sharp and clear.
Benefits of Effective Keystone Correction:
The advantages of employing keystone correction are numerous and directly contribute to a more professional and engaging viewing experience:
- Perfectly Rectangular Images: The most obvious benefit is the elimination of image distortion, resulting in a clean, professional, and aesthetically pleasing rectangular display.
- Enhanced Readability: Text becomes sharp and easy to read, crucial for presentations and educational content.
- Improved Image Quality: By correcting distortion, you prevent elements from appearing stretched or compressed, preserving the intended proportions and clarity of your visuals.
- Professionalism: A distortion-free image exudes professionalism, whether you’re impressing clients in a boardroom or sharing a movie with friends.
- Flexibility in Placement: Keystone correction grants you greater freedom in projector placement. You’re no longer strictly bound by needing to position the projector precisely perpendicular to the screen. This is particularly useful in situations with limited space or awkward room layouts.
- Immersive Viewing Experience: For entertainment, a perfectly aligned image enhances immersion, making movies and games more captivating.
Tips for Maximizing Your Mini Projector’s Keystone Correction:
- Minimize Angle: While keystone correction is a powerful tool, it’s always best to start with the projector as close to perpendicular as possible. The less correction needed, the better the image quality.
- Use a Stable Mount: A wobbly projector will make fine-tuning keystone correction difficult. Invest in a stable tripod or mount for consistent results.
- Check Your Projector’s Specifications: Understand the range and capabilities of your mini projector’s keystone correction. Some offer a wider adjustment range than others.
- Consider a Projector Screen: While keystone correction works on most surfaces, a dedicated projector screen provides a uniform, reflective surface that further enhances image quality and makes correction easier.
- Experiment with Settings: Don’t be afraid to play around with the keystone settings to understand how they affect your image.
- Regularly Check Alignment: If you frequently move your mini projector, take a moment before each use to check and adjust keystone correction as needed.
When Keystone Correction Might Not Be Enough:
While incredibly useful, keystone correction has its limitations. If the projector is placed at an extremely steep angle, the digital correction might start to noticeably degrade image quality. In such scenarios, consider alternative solutions like:
- Adjusting Physical Placement: Try to find a better position for the projector that requires less correction.
- Using a Projector Mount: A mount can allow for more precise positioning and often offers tilt and swivel capabilities.
- Employing an Offset Lens: Some projectors have an offset lens, meaning the image is projected slightly above or below the projector’s center. This can reduce the need for keystone correction in certain setups.
The Future of Mini Projector Display Technology:
As mini projector technology continues to evolve, we can expect even more sophisticated and seamless keystone correction features. Innovations like automatic keystone detection, where the projector uses sensors to automatically detect the screen angle and apply correction, are becoming more common. Furthermore, advancements in optical correction might trickle down to more affordable models, offering superior image quality without compromise.
Conclusion:
Keystone correction is not merely a technical feature; it’s the key to unlocking the full potential of your mini projector. By understanding its principles and mastering its application, you can transform any surface into a pristine display, ensuring your presentations are impactful, your movies are immersive, and your visual experiences are always perfect. Invest the time to learn how to use it, and you’ll be rewarded with consistently stunning visuals, every single time.
E GATE Atom 4X Automatic Projector 4k Ultra HD | Live TV | Android | Brightest 400 ISO | Native 1080p, Netflix, Prime | Precision Focus - Auto Keystone | USB-HDMI ARC+CEC | HDR+HLG | WiFi 6-BT | Egate
₹8,390.00 (as of July 9, 2026 00:51 GMT +05:30 - More infoProduct prices and availability are accurate as of the date/time indicated and are subject to change. Any price and availability information displayed on [relevant Amazon Site(s), as applicable] at the time of purchase will apply to the purchase of this product.)
Lifelong Electronics Lightbeam Smart LED Projector | Android 14, 1080P & 4K Ultra HD Support, 4000 Lumens | All OTT Apps (Netflix, Prime, Jio etc.) | Auto Keystone, WiFi/BT, HDMI, Cast, 150” Screen
₹5,889.00 (as of July 9, 2026 00:51 GMT +05:30 - More infoProduct prices and availability are accurate as of the date/time indicated and are subject to change. Any price and availability information displayed on [relevant Amazon Site(s), as applicable] at the time of purchase will apply to the purchase of this product.)
[Google TV Official] Crossbeats Lumex Solis Projector 4k Ultra HD, 1080p Native, Android 14 WiFi, 1000 ANSI, Smart Mini Projector for Room, Portable Home Theater Cinema, Built-in Apps, 300''Display
₹18,999.00 (as of July 9, 2026 00:51 GMT +05:30 - More infoProduct prices and availability are accurate as of the date/time indicated and are subject to change. Any price and availability information displayed on [relevant Amazon Site(s), as applicable] at the time of purchase will apply to the purchase of this product.)
XElectron iProjector 3 Plus | Official Google TV | Dust Proof | Brightest 2000 ANSI, Native 1080p Smart Projector 4k Ultra HD for Home | Auto Focus & Keystone, HDMI ARC, WiFi & BT, Screen Mirroring
₹24,989.00 (as of July 9, 2026 00:51 GMT +05:30 - More infoProduct prices and availability are accurate as of the date/time indicated and are subject to change. Any price and availability information displayed on [relevant Amazon Site(s), as applicable] at the time of purchase will apply to the purchase of this product.)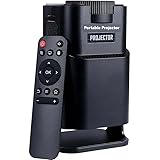
Hy320 Mini Portable Projector-5G WiFi 6,Bluetooth 5.0 and Android 11,Support 4K and 1080P Full Hd, Led Projector with 4D/4P and Auto Correction,180° Rotation,Electronic Zoom
₹3,649.00 (as of July 9, 2026 00:51 GMT +05:30 - More infoProduct prices and availability are accurate as of the date/time indicated and are subject to change. Any price and availability information displayed on [relevant Amazon Site(s), as applicable] at the time of purchase will apply to the purchase of this product.)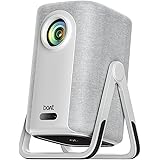
Boat CineHead M1 Smart Projector, Honest 200 ANSI Lumens, Native 1080P, Auto Focus & Auto Keystone Correction, Adjustable Stand, 6W Speaker, WiFi & Bluetooth, Screen Mirroring, HDMI (Ivory White)
₹11,999.00 (as of July 9, 2026 00:51 GMT +05:30 - More infoProduct prices and availability are accurate as of the date/time indicated and are subject to change. Any price and availability information displayed on [relevant Amazon Site(s), as applicable] at the time of purchase will apply to the purchase of this product.)
Reysol Projector | Native 1080P | 4K Support | Android 14 | WiFi 6 | Miracast | 270° Rotatable | Auto Keystone | Bright 14000 Lumens (Speaker/Remote Controller) Portable Projector (Grey Colour)
₹4,990.00 (as of July 9, 2026 00:51 GMT +05:30 - More infoProduct prices and availability are accurate as of the date/time indicated and are subject to change. Any price and availability information displayed on [relevant Amazon Site(s), as applicable] at the time of purchase will apply to the purchase of this product.)
Portable Mini Projector, 4K 1080P Full HD Projector, Support Video Projector, WiFi 5G BT 5.0, Cinema Projector 180° Can Be Rotated, Android 11, Compatible with TV Stick for Adult's, Home Cinema, Compatible for Kids and Adults R4
₹3,099.00 (as of July 9, 2026 00:51 GMT +05:30 - More infoProduct prices and availability are accurate as of the date/time indicated and are subject to change. Any price and availability information displayed on [relevant Amazon Site(s), as applicable] at the time of purchase will apply to the purchase of this product.)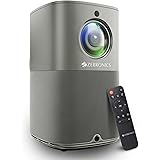
ZEBRONICS PIXAPLAY 18, Smart LED Vertical Projector, 3800 Lumens, 4K Support, Dolby Audio, 200 inch Screen Size, HDMI, USB, WiFi, Supports Bluetooth, 1080p Native, Electronic Focus, APP Support
₹11,999.00 (as of July 9, 2026 00:51 GMT +05:30 - More infoProduct prices and availability are accurate as of the date/time indicated and are subject to change. Any price and availability information displayed on [relevant Amazon Site(s), as applicable] at the time of purchase will apply to the purchase of this product.)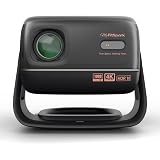
MyFitSpark CINEMAGIC 102 Pro Native 1080p Projector 4k Ultra HD Support | CineTone Engine 100% Sealed Tiltable 600 ANSI Auto Focus Keystone EDID 2.1 True 4K FireStick HDR10 Surround Sound Up to 300"
₹27,999.00 (as of July 9, 2026 00:51 GMT +05:30 - More infoProduct prices and availability are accurate as of the date/time indicated and are subject to change. Any price and availability information displayed on [relevant Amazon Site(s), as applicable] at the time of purchase will apply to the purchase of this product.)
Portronics Beem 570 Smart Projector | Netflix Certified | 1080p Full HD Native | 10000 Lumens | Android 13 | Upto 120" Screen | Auto Keystone, Obstacle Avoidance | Built-in Apps | 5W Speaker (Silver)
₹17,998.00 (as of July 9, 2026 00:51 GMT +05:30 - More infoProduct prices and availability are accurate as of the date/time indicated and are subject to change. Any price and availability information displayed on [relevant Amazon Site(s), as applicable] at the time of purchase will apply to the purchase of this product.)
Smart Projector with Android 11 HD Projector 1080P 4K WiFi6 BT Home Theater Video Projector 180° Rotatable Stand Car Keystone Correction for Mobile Phone TV Stick
₹2,999.00 (as of July 9, 2026 00:51 GMT +05:30 - More infoProduct prices and availability are accurate as of the date/time indicated and are subject to change. Any price and availability information displayed on [relevant Amazon Site(s), as applicable] at the time of purchase will apply to the purchase of this product.)
Smart Projector with Android 11 HD Projector 1080P 4K WiFi6 BT Home Theater Video Projector 180° Rotatable Stand Car Keystone Correction for Mobile Phone TV Stick B1
₹2,799.00 (as of July 9, 2026 00:51 GMT +05:30 - More infoProduct prices and availability are accurate as of the date/time indicated and are subject to change. Any price and availability information displayed on [relevant Amazon Site(s), as applicable] at the time of purchase will apply to the purchase of this product.)
Wzatco Yuva Horizon, Google TV Official, Native 1080P Projector 4k Ultra HD, 1500 ANSI Ultra Bright, Fully Automatic, Sealed Engine, Smart Mini Theater for Room, Home Cinema, White
₹21,990.00 (as of July 9, 2026 00:51 GMT +05:30 - More infoProduct prices and availability are accurate as of the date/time indicated and are subject to change. Any price and availability information displayed on [relevant Amazon Site(s), as applicable] at the time of purchase will apply to the purchase of this product.)
Smart Projector with Android 11 HD Projector 1080P 4K WiFi6 BT Home Theater Video Projector 180° Rotatable Stand Car Keystone Correction for Mobile Phone TV Stick B1
Now retrieving the price.
(as of July 9, 2026 00:51 GMT +05:30 - More infoProduct prices and availability are accurate as of the date/time indicated and are subject to change. Any price and availability information displayed on [relevant Amazon Site(s), as applicable] at the time of purchase will apply to the purchase of this product.)
WZATCO Yuva Vibe, Certified OS Smart Home Projector, Native 1080P Fully Automatic, HDMI ARC, WiFi 6 & BT, 14000 Lumens, Screen Mirroring, Portable Room Cinema, Black
₹14,990.00 (as of July 9, 2026 00:51 GMT +05:30 - More infoProduct prices and availability are accurate as of the date/time indicated and are subject to change. Any price and availability information displayed on [relevant Amazon Site(s), as applicable] at the time of purchase will apply to the purchase of this product.)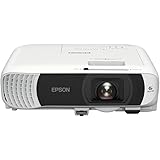
Epson EB-W53 WXGA 3LCD Projector, 4,000 lumens, Full HD, Built-in 16W Speaker
₹28,349.00 (as of July 9, 2026 00:51 GMT +05:30 - More infoProduct prices and availability are accurate as of the date/time indicated and are subject to change. Any price and availability information displayed on [relevant Amazon Site(s), as applicable] at the time of purchase will apply to the purchase of this product.)
E GATE Atom 3X Projector 4k Ultra HD Full HD 1080p Native Automatic Home Projector for Room | 300 ISO | Rotatable Design | Android Netflix Prime | ARC-HDMI USB WiFi-6 BT Screen Mirroring Egate
₹7,990.00 (as of July 9, 2026 00:51 GMT +05:30 - More infoProduct prices and availability are accurate as of the date/time indicated and are subject to change. Any price and availability information displayed on [relevant Amazon Site(s), as applicable] at the time of purchase will apply to the purchase of this product.)
E GATE Atom 4X+ Fully Automatic Projector 4k Ultra HD | Whale TV+ Live TV on Android | Brightest 400 ISO | Native 1080p, Netflix, Prime | USB-HDMI ARC+CEC | HDR+HLG | WiFi 6, BT, Egate mini Projectors
₹8,990.00 (as of July 9, 2026 00:51 GMT +05:30 - More infoProduct prices and availability are accurate as of the date/time indicated and are subject to change. Any price and availability information displayed on [relevant Amazon Site(s), as applicable] at the time of purchase will apply to the purchase of this product.)