Unlock Vibrant Health: Cold Press Juicing for Beginners – A Step-by-Step Guide
Embarking on the journey of cold press juicing can feel like unlocking a treasure chest of vibrant health and delicious, nutrient-dense beverages. Unlike traditional centrifugal juicers that generate heat, cold press juicers, also known as masticating juicers, employ a slow, grinding mechanism to extract juice. This gentle process preserves more vitamins, enzymes, and minerals, resulting in a superior quality juice with a longer shelf life. For beginners, understanding the nuances of this method is key to maximizing its benefits and enjoying the process. This comprehensive guide will demystify cold press juicing, providing a clear, step-by-step approach to get you started on your path to a healthier you.
Understanding the Cold Press Difference: Why Choose This Method?
The fundamental difference lies in the extraction process. Centrifugal juicers use a high-speed spinning blade that grinds produce against a mesh screen, generating heat and oxidizing nutrients. This heat can degrade delicate enzymes and vitamins, diminishing the nutritional potency of the juice. Cold press juicers, on the other hand, work by crushing and pressing the produce slowly. This minimal oxidation preserves the integrity of nutrients, resulting in a juice that is richer in flavor, color, and, most importantly, beneficial compounds. This preservation also contributes to a longer shelf life, allowing you to store your freshly pressed juice for up to 72 hours in the refrigerator. For those seeking maximum nutrient absorption and a truly revitalizing experience, cold press juicing is the superior choice.
Choosing Your Cold Press Juicer: Features to Consider
Selecting the right juicer is a crucial first step. While the core function remains the same, various models offer different features.
- Single-Gear vs. Twin-Gear: Single-gear juicers are typically more affordable and simpler to operate. They use a single auger to crush and press. Twin-gear juicers, while more expensive, often extract more juice and are more efficient at handling tougher ingredients like leafy greens and fibrous vegetables.
- Vertical vs. Horizontal: Vertical juicers are generally more compact and easier to assemble. They excel at juicing fruits and softer vegetables. Horizontal juicers are often more versatile, capable of handling a wider range of produce, including wheatgrass and nuts, and can also function as food processors.
- Ease of Cleaning: This is paramount for any juicer. Look for models with fewer parts and dishwasher-safe components. Some juicers come with specialized cleaning brushes.
- Motor Power and Durability: A more powerful motor generally translates to better performance, especially with harder ingredients. Consider models made with high-quality, durable materials for longevity.
- Budget: Cold press juicers can range from moderately priced to quite expensive. Determine your budget beforehand and research models within that range. Reading reviews from other beginners can be incredibly helpful.
Essential Juicing Ingredients: What to Put In
The beauty of cold press juicing lies in its versatility. You can create an endless array of delicious and nutritious combinations. For beginners, it’s wise to start with a balance of fruits and vegetables.
Fruits:
- Apples: Provide sweetness and a good base. Varieties like Fuji, Gala, and Honeycrisp are excellent choices.
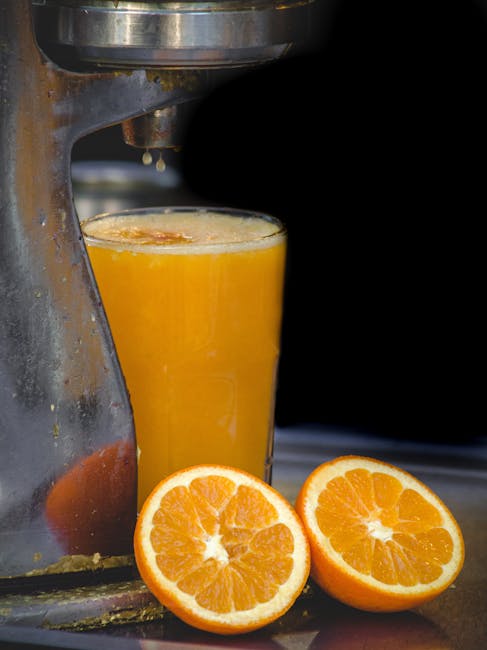
- Oranges: Offer a citrusy tang and vitamin C. Peel them before juicing to avoid bitterness.
- Pineapple: Adds tropical sweetness and digestive enzymes. Remove the tough outer rind and core.
- Berries (Strawberries, Blueberries, Raspberries): Packed with antioxidants. Use them in moderation as they can be quite seedy.
- Grapes: Provide natural sweetness and hydration.
Vegetables:
- Leafy Greens (Spinach, Kale, Romaine Lettuce): Nutrient powerhouses. Start with milder greens like spinach and gradually introduce tougher ones like kale.
- Cucumber: Hydrating and refreshing, with a mild flavor.
- Carrots: Offer sweetness and beta-carotene.
- Celery: Adds a subtle savory note and is rich in electrolytes.
- Ginger: A small piece adds a zesty kick and anti-inflammatory benefits.
- Beets: Earthy and vibrant, packed with nutrients. Start with small amounts as they have a strong flavor.
Tips for Beginners:
- Start Simple: Begin with 2-3 ingredients to get a feel for the flavors and your juicer.
- Balance Sweetness and Greens: Combine sweet fruits with nutrient-rich vegetables to create palatable juices. A good starting ratio is 60% fruit to 40% vegetables.
- Consider Flavor Profiles: Think about how different ingredients will taste together. Lemon or lime can brighten up earthy flavors.
- Experiment: Don’t be afraid to try new combinations as you gain confidence.
Preparing Your Produce: The Foundation of Great Juice
Proper preparation is key to efficient juicing and optimal flavor.
- Wash Thoroughly: Always wash all fruits and vegetables under cold running water to remove dirt, pesticides, and any other contaminants.
- Remove Unnecessary Parts:
- Pits and Seeds: Remove pits from fruits like peaches, plums, and cherries, and large seeds from fruits like melons and avocados. Small seeds in berries are generally fine.
- Tough Rinds and Peels: Remove thick, inedible rinds from citrus fruits (save the pith for other uses if desired), pineapple, and melons. Some peels, like those of apples and cucumbers, can be left on if organic and washed well, as they contain valuable nutrients.
- Stems and Cores: Remove tough stems from kale and other leafy greens. Remove the core from apples and pears if your juicer struggles with it.
- Cut into Appropriate Sizes: Your juicer’s chute size will dictate how large you can cut your produce. Generally, cut ingredients into pieces that fit comfortably into the chute to avoid jamming. For leafy greens, you can often bunch them together.
- Consider Texture: Softer ingredients like berries and tomatoes can be juiced more easily if they are slightly firmer. Harder ingredients like carrots and beets should be cut into manageable chunks.
The Juicing Process: A Step-by-Step Walkthrough
Once your produce is prepped, the juicing itself is straightforward.
- Assemble Your Juicer: Follow your juicer’s manual for proper assembly. Ensure all parts are securely in place.
- Place a Container Under the Spout: Position a pitcher or glass beneath the juice spout to catch your freshly pressed liquid gold.
- Turn On the Juicer: Switch on your cold press juicer.
- Feed Produce Gradually: Begin feeding your prepared ingredients into the chute, one at a time or in small batches.
- Alternate Ingredients: For optimal juicing, especially with leafy greens, alternate between softer and harder ingredients, or between fruits and vegetables. This helps push everything through the juicer efficiently.
- Use the Tamper (If Provided): If your juicer comes with a tamper, use it to gently push down ingredients that might get stuck. Avoid forcing them.
- Monitor Pulp Ejection: Most cold press juicers have separate containers for juice and pulp. Ensure these are positioned correctly.
- Continue Until Finished: Process all your prepared produce until you have extracted all the desired juice.
- Turn Off the Juicer: Once you’ve finished, switch off the juicer.
Cleaning Your Cold Press Juicer: The Key to Longevity
Prompt cleaning is essential for maintaining your juicer and preventing any buildup of residue.
- Disassemble Immediately: As soon as you finish juicing, take your juicer apart. This prevents pulp from drying and becoming difficult to remove.
- Rinse All Parts: Rinse each component under warm running water to remove most of the pulp and juice.
- Scrub with a Brush: Use the cleaning brush that came with your juicer (or a soft-bristled brush) to scrub any remaining pulp from the screens, auger, and other parts. Pay close attention to mesh screens.
- Wash with Soap (Optional): For a more thorough clean, you can wash parts with mild dish soap and warm water. Rinse thoroughly afterward.
- Dry Completely: Ensure all parts are completely dry before reassembling or storing them. This prevents mold and mildew.
- Wipe Down the Motor Base: Use a damp cloth to wipe down the motor base. Never immerse the motor base in water.
- Regular Deep Cleaning: Depending on your usage, consider a deeper clean every few weeks with a specialized juicer cleaning solution if recommended by the manufacturer.
Beginner-Friendly Juice Recipes to Get You Started
Here are a few simple yet delicious recipes to inspire your first juicing adventures:
1. The Green Revitalizer:
- 2 green apples
- 1 cucumber
- 4-5 celery stalks
- 1 small handful of spinach
- 1/2 inch piece of ginger (optional)
2. The Sunrise Citrus Boost:
- 2 oranges (peeled)
- 1 large carrot
- 1/2 inch piece of ginger
- 1/2 lemon (peeled)
**3. The Berry