
Steady Hands, Sharper Shots: A Beginner’s Guide to Tripods for New Photographers
For aspiring photographers, the pursuit of sharper images and more creative control often leads to a crucial piece of equipment: the tripod. While seemingly straightforward, understanding tripods can unlock a world of photographic possibilities previously out of reach. This guide will demystify the tripod, equipping you with the knowledge to choose, use, and ultimately benefit from this essential tool.
Why Bother with a Tripod? The Fundamental Advantages
At its core, a tripod eliminates camera shake. This seemingly simple function has profound implications for image quality.
- Enhanced Sharpness: Even the steadiest hands introduce micro-vibrations, especially at slower shutter speeds. A tripod provides a stable platform, ensuring your camera remains perfectly still, resulting in tack-sharp images free from blur. This is particularly vital in low light conditions where longer exposures are necessary.
- Creative Control with Shutter Speed: Without a tripod, you’re often limited to faster shutter speeds to avoid blur. A tripod liberates you to experiment with slow shutter speeds to capture motion blur in water, light trails from cars, or the ethereal movement of clouds.
- Precise Composition: A tripod allows you to meticulously frame your shot. You can lock your camera in position and fine-tune your composition without the fatigue of holding the camera. This is invaluable for landscape, architectural, and still-life photography.
- Long Exposures and Special Effects: Capturing stunning night sky photos, creating silky smooth water effects, or achieving light painting requires exposures that can last seconds or even minutes. Handholding is simply not an option.
- Self-Portraits and Group Shots: Want to be in the photo with your friends or family? A tripod allows you to set up your camera, use a timer or remote, and join the scene without relying on a stranger.
- Video Stability: For aspiring videographers, a tripod is non-negotiable. It ensures smooth pans, tilts, and static shots, elevating the professionalism of your video content.
Decoding Tripod Terminology: Key Components Explained
Before diving into selection, understanding the parts of a tripod is essential:
- Legs: These are the foundation of your tripod. They can be made of aluminum (lighter, more affordable) or carbon fiber (lighter, stronger, more expensive, better vibration dampening). Look for legs with multiple sections that allow for adjustable height.
- Leg Locks: These secure the leg sections at your desired height. Common types include flip locks (quick and easy to adjust) and twist locks (can be more secure but slower to operate).
- Center Column: This vertical column extends upwards from the tripod head, allowing you to further adjust the camera’s height without changing the leg angles. Some center columns can be inverted for low-angle shooting.
- Feet: The tips of the legs. They can be rubber (for general surfaces), spiked (for uneven terrain like grass or dirt), or have integrated spikes.
- Head: The mechanism that attaches to your camera and allows you to position it. This is arguably the most critical component.
The Heart of the Matter: Understanding Tripod Heads
The tripod head dictates how you move and secure your camera. The three most common types for beginners are:
- Ball Head: This is the most popular choice for its versatility and speed. A single knob controls both tension and lock. You can quickly move your camera to any angle and then lock it in place. Ideal for general photography, travel, and situations requiring quick adjustments.
- Pros: Fast, intuitive, offers a wide range of motion.
- Cons: Can be less precise for fine-tuning angles compared to other heads.
- Pan-and-Tilt Head (Three-Way Head): This head features three separate handles, one for panning (horizontal movement), one for tilting (up/down), and one for roll (sideways tilt). It offers excellent precision for architectural and landscape photography where precise alignment is crucial.
- Pros: Extremely precise control over each axis, great for precise framing.
- Cons: Slower to adjust than a ball head, can be bulkier.
- Fluid Head: Primarily used for video, these heads offer incredibly smooth and controlled movements. They use fluid cartridges to dampen motion, preventing jerky pans and tilts. While overkill for most still photography, they are essential for smooth video work.
- Pros: Unmatched smoothness for video, precise control.
- Cons: Generally more expensive, not typically needed for still photography.
Choosing Your First Tripod: Key Considerations
When selecting your first tripod, keep these factors in mind:
- Weight Capacity: This is paramount. Ensure the tripod’s maximum load capacity significantly exceeds the combined weight of your camera, lens, and any accessories you might attach (like a flash). Overloading a tripod can lead to instability and damage. Look for a capacity that’s at least 1.5 to 2 times your equipment’s weight.
- Height: Consider the maximum and minimum height. You’ll want a tripod that can extend high enough to comfortably shoot at eye level without straining, and also go low enough for creative perspectives. A tripod that reaches your eye level when fully extended without using the center column is generally ideal.
- Portability: If you plan on hiking or traveling with your tripod, weight and folded size are crucial. Carbon fiber tripods are lighter but more expensive. Consider how you’ll transport it – does it have a carrying bag?
- Stability: The sturdier the tripod, the better. Wider leg stances and thicker leg tubes contribute to greater stability. Avoid flimsy tripods that wobble when you touch them.
- Build Quality and Durability: Invest in a tripod that feels robust and well-made. Read reviews and look for brands known for their quality. A good tripod is an investment that will last for years.
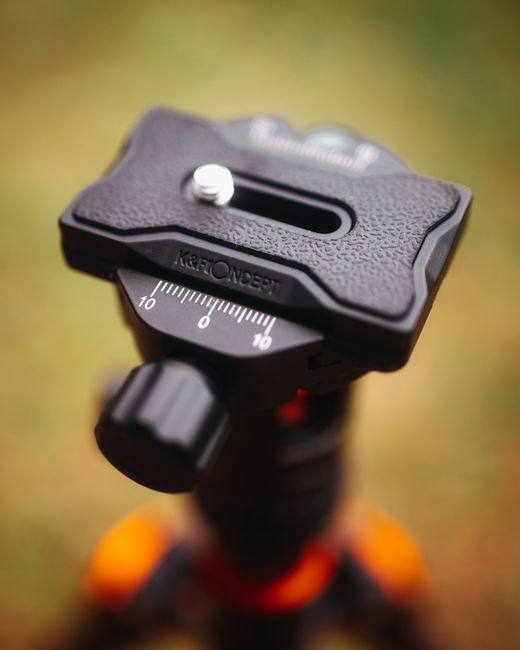
- Quick Release Plate: Most tripod heads use a quick-release plate that attaches to your camera. This allows you to quickly detach and reattach your camera without having to screw and unscrew it each time. Ensure the plate is compatible with your camera and easy to use.
Mastering the Art of Tripod Use: Essential Techniques
Once you have your tripod, learning to use it effectively is key:
- Set it Up Properly: Extend the legs outwards for maximum stability, especially on uneven surfaces. Ensure all leg locks are securely fastened. Avoid extending the center column unnecessarily, as this reduces stability.
- Leveling: Use the bubble level on your tripod head or camera to ensure your horizon is straight. This is crucial for landscapes and architecture.
- Camera Attachment: Securely attach the quick-release plate to your camera’s tripod mount. Then, firmly attach the camera to the tripod head.
- Framing and Composition: Once the camera is mounted, take your time to compose your shot. Use the tripod’s adjustability to fine-tune your framing.
- Focusing: With the camera locked down, use your camera’s autofocus system or manual focus to achieve critical sharpness.
- Shutter Release: To avoid camera shake when pressing the shutter button, use your camera’s self-timer (2-second delay is usually sufficient) or a remote shutter release (wired or wireless). This allows vibrations from your finger press to dissipate before the shutter opens.
- Adjusting for Height: If you need to adjust the height, try adjusting the leg sections first before resorting to raising the center column.
- Windy Conditions: In windy situations, add weight to the center column hook (if your tripod has one) by hanging your camera bag. This lowers the center of gravity and increases stability.
Beyond the Basics: Advanced Tips for Tripod Users
As you become more comfortable, consider these advanced techniques:
- Low-Angle Shooting: Many tripods allow their center columns to be inverted or have a short center column for shooting very close to the ground. This opens up unique perspectives.
- Panoramic Photography: A tripod is essential for creating seamless panoramas. Use a panoramic head or carefully align your shots by rotating the camera on the tripod.
- Time-Lapse Photography: For creating time-lapses, a sturdy tripod is crucial to keep your camera perfectly still between shots.
- Focus Stacking: This technique involves taking multiple shots with slightly different focus points and then merging them in post-processing to achieve an extended depth of field. A tripod is indispensable for this.
Maintenance for Longevity
To ensure your tripod serves you well for years to come:
- Keep it Clean: Wipe down your tripod after each use, especially if you’ve been in dusty or wet environments. Pay attention to leg locks and joints.
- Lubricate (if necessary): Some tripods may benefit from occasional lubrication of moving parts, but always refer to the manufacturer’s instructions.
- Inspect for Damage: Regularly check for loose screws, cracked parts, or worn-out components.
Investing in a tripod is an investment in your photographic journey. By understanding its components, choosing wisely, and practicing its use, you’ll unlock a new level of control and creativity, leading to significantly improved image quality and a more fulfilling photography experience.