
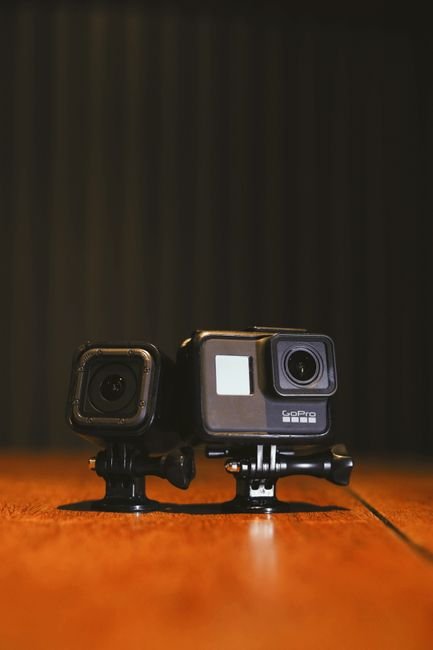
Action camera settings are not just checkboxes; they are the keys to unlocking your camera’s full potential, transforming mundane footage into breathtaking cinematic experiences. Understanding and mastering these settings allows you to capture stunning visuals, whether you’re scaling a mountain, diving into the ocean, or simply navigating a bustling city street. This comprehensive guide will delve deep into the crucial settings, empowering you to make informed decisions and elevate your action videography.
Resolution: The Foundation of Clarity
Resolution dictates the number of pixels that make up your image. Higher resolutions mean sharper, more detailed footage. Common options include:
- 4K (3840 x 2160): The current standard for high-quality video. Offers incredible detail, allowing for significant cropping in post-production without noticeable quality loss. Ideal for cinematic shots, landscapes, and situations where maximum detail is paramount. However, 4K files are large, demanding more storage space and processing power.
- 2.7K (2704 x 1520): A good compromise between 4K and 1080p. Provides excellent detail, is more manageable in terms of file size and processing, and still offers decent cropping capabilities. A solid choice for general use.
- 1080p (1920 x 1080): Full High Definition (HD). Still widely used and offers good quality for most applications. Files are smaller and easier to edit, making it ideal for social media, everyday vlogging, or when storage is a concern.
- 720p (1280 x 720): Standard HD. While less detailed, it’s the most storage-efficient option. Best suited for quick clips, situations with limited storage, or when extreme detail isn’t a priority.
Frame Rate: The Illusion of Motion
Frame rate (fps – frames per second) determines the smoothness of your video. Higher frame rates capture more images per second, resulting in smoother motion.
- 24fps/25fps: The standard cinematic frame rate. Offers a natural, film-like look. Best for storytelling and when you want to evoke a specific mood.
- 30fps: A common broadcast standard. Provides smooth motion suitable for most general-purpose recording.
- 60fps: Ideal for capturing fast-paced action. Allows for smooth playback of quick movements and provides the option for slow-motion effects when edited down to 24/30fps.
- 120fps/240fps: High frame rates for dramatic slow-motion. Perfect for capturing the intricate details of high-speed events, such as a splash of water, a skateboard trick, or a bird in flight. Remember, higher frame rates often come with a trade-off in image quality or require more light.
Field of View (FOV): Capturing the Bigger Picture
FOV determines how much of the scene your camera captures. Action cameras typically offer a wide-angle lens.
- SuperView/Wide: The widest FOV, capturing almost everything in front of the lens. Great for immersive experiences and conveying a sense of scale. Can lead to distortion at the edges and fisheye effects.
- Wide: A slightly narrower but still very wide view. Offers a good balance between immersion and minimizing distortion.
- Linear: Removes the fisheye distortion, providing a more natural perspective. Ideal for situations where accurate representation is important, like filming interviews or architectural shots.
- Narrow: The tightest FOV, focusing on a specific subject. Useful for isolating details or creating a more traditional camera look.
Shutter Speed: Freezing or Blurring Motion
Shutter speed controls the duration the camera’s sensor is exposed to light. In video, it’s often linked to frame rate for natural motion blur.
- The 180-Degree Rule: For a natural look, set your shutter speed to be twice your frame rate. For 24fps, use 1/48 sec (or 1/50 sec as a close approximation). For 60fps, use 1/120 sec. This creates a pleasing amount of motion blur, making fast movements look fluid.
- Faster Shutter Speeds: Freeze motion, ideal for capturing sharp details of fast-moving subjects. However, can make footage appear jerky and underexposed.
- Slower Shutter Speeds: Introduce more motion blur, creating a dreamy or artistic effect. Can lead to overexposure in bright conditions.
ISO: Managing Low Light Sensitivity
ISO controls the camera’s sensitivity to light. Higher ISO values allow you to shoot in darker conditions but can introduce digital noise (grain).
- Lower ISO (e.g., 100-400): Best for well-lit conditions, producing the cleanest images with minimal noise.
- Higher ISO (e.g., 800+): Necessary for low-light shooting. Be mindful of the noise introduced and aim to keep it as low as possible while still achieving proper exposure. Many action cameras have automatic ISO settings that can be helpful.
White Balance (WB): Accurate Color Representation
White balance adjusts the color temperature of your footage to ensure that whites appear white under different lighting conditions.
- Auto WB: The camera automatically adjusts. Often works well, but can sometimes be fooled by mixed lighting.
- Presets (Daylight, Cloudy, Tungsten, Fluorescent): Select the preset that best matches your shooting environment for more consistent color.
- Custom WB: For precise control, you can manually set the white balance by pointing the camera at a white or gray card in your scene. This is crucial for accurate color grading.
Exposure Compensation: Fine-Tuning Brightness
Exposure compensation allows you to manually adjust the brightness of your footage beyond what the automatic settings provide.
- Positive Compensation (+): Makes the image brighter. Useful in backlit situations or when you want a lighter overall tone.
- Negative Compensation (-): Makes the image darker. Useful in bright sunlight to prevent overexposure or when you want a moodier feel.
Picture Profiles/Color Settings: Shaping Your Visual Style
Many action cameras offer various picture profiles or color settings that alter the look and feel of your footage.
- Standard/Vivid: Produces punchy colors and high contrast, often suitable for immediate sharing.
- Flat/Log: Captures footage with minimal processing, preserving the maximum dynamic range and color information. This is ideal for professional color grading in post-production, offering the most flexibility.
- Custom Profiles: Some cameras allow you to create and save your own custom color profiles, adjusting sharpness, contrast, and saturation to your preference.
Stabilization: Smooth Sailing Through Bumps
Electronic Image Stabilization (EIS) digitally smooths out shaky footage.
- On/Off: Simple toggle. Turning it on can significantly improve handheld shots and reduce the impact of vibrations.
- Levels: Some cameras offer different stabilization levels. Higher levels can sometimes crop into your image more or introduce artifacts. Experiment to find the best balance.
- HyperSmooth/RockSteady (Proprietary Tech): Advanced stabilization systems that are incredibly effective at producing gimbal-like smoothness.
Protune/Pro Mode: Unlocking Advanced Control
Many action cameras have a “Protune” or “Pro Mode” that unlocks a wider range of manual controls and higher quality recording options. This is where serious videographers will spend most of their time. Within Protune, you’ll often find:
- Bitrate: The amount of data used to record each second of video. Higher bitrates (e.g., 100Mbps) result in more detail and fewer compression artifacts, especially in fast-moving scenes. This significantly impacts file size.
- Sharpness: Controls the in-camera sharpening. Lower sharpness is generally preferred when shooting in Log or Flat profiles, allowing for more control in post-production.
- Color: As mentioned in Picture Profiles, this allows for fine-tuning.
- EV Comp (Exposure Value Compensation): A more granular control over exposure.
Audio Settings: Capturing Immersive Sound
Don’t neglect audio! It’s as crucial as video for a compelling experience.
- Microphone Type: Most action cameras have built-in microphones. Some offer external microphone support for significantly improved audio quality.
- Audio Wind Reduction: Essential for outdoor shooting, this setting helps to minimize wind noise.
- Audio Levels: Manual control over audio input levels can prevent clipping (distortion) or ensure you’re capturing enough sound.
Advanced Features to Explore:
- Time Lapse: Capture a series of photos over a set interval to create a sped-up video of a slow process.
- Night Lapse: Similar to time lapse but optimized for low-light conditions.
- Slow Motion: Record at high frame rates for dramatic slow-motion playback.
- Burst Mode: Capture a rapid series of still photos, useful for action sequences.
- HDR (High Dynamic Range): Captures a wider range of light and shadow detail, resulting in more balanced and visually appealing images, especially in high-contrast scenes.
Mastering Your Action Camera Settings:
The key to unlocking your action camera’s full potential lies in experimentation and understanding the interplay between these settings.
- Know Your Goal: