
An ice cream maker is a gateway to frozen dessert bliss, transforming simple ingredients into creamy, delightful treats. To ensure your machine consistently churns out perfect ice cream, sorbet, or gelato, regular and proper maintenance is paramount. Neglecting your ice cream maker can lead to diminished performance, unsanitary conditions, and even premature breakdown. This comprehensive guide delves into the essential aspects of ice cream maker maintenance, empowering you to keep your machine in pristine condition and your frozen dessert creations consistently exceptional.
Understanding Your Ice Cream Maker: A Crucial First Step
Before diving into specific maintenance tasks, familiarize yourself with your particular ice cream maker model. Different types of machines – compressor models, freezer bowl models, and salt-and-ice models – have unique components and require slightly varied care.
- Compressor Models: These self-refrigerating units are the most convenient, but their internal compressor requires good airflow and occasional dusting.
- Freezer Bowl Models: These rely on a pre-frozen bowl. Proper freezing and thorough cleaning of the bowl are critical.
- Salt-and-Ice Models: These older, more traditional machines require manual packing of ice and salt. Cleaning is essential to prevent rust and residue buildup.
Consult your owner’s manual. It’s your definitive resource for model-specific instructions, recommended cleaning agents, and troubleshooting tips. Pay attention to the materials used in your machine, as this will dictate appropriate cleaning methods.
The Cornerstone of Cleanliness: Regular Cleaning
Sanitation is the most vital aspect of ice cream maker maintenance. Bacteria and mold can thrive in moist environments, compromising the safety and taste of your frozen treats.
Post-Use Cleaning: Every Single Time
This is non-negotiable. After each use, disassemble your ice cream maker and clean all removable parts thoroughly.
- Disassembly: Carefully detach the dasher (paddle), lid, and any other removable components.
- Washing: Wash these parts in warm, soapy water. Use a mild dish soap and a soft sponge or brush. For stubborn residue, a soft-bristled brush is ideal for reaching nooks and crannies. Avoid abrasive scrubbers or steel wool, which can scratch and damage plastic components.
- Rinsing: Rinse all parts thoroughly with clean water to remove any soap residue.
- Drying: This is a critical step often overlooked. Ensure all parts are completely dry before reassembling or storing. Moisture trapped within components can lead to mold growth. Air-dry parts on a drying rack or use a clean, lint-free towel. For freezer bowl models, ensure the bowl is bone dry before returning it to the freezer.
- Wiping Down the Base: Even if the base isn’t directly in contact with the ice cream mixture, spills and splatters can occur. Wipe down the exterior of the base with a damp cloth and mild soap. For compressor models, ensure the ventilation grilles are free of debris.
Deep Cleaning: Periodically for Optimal Hygiene
Beyond daily cleaning, a deeper clean is recommended every few uses or at least monthly, depending on usage frequency.
- Disassemble: As with regular cleaning, start by fully disassembling the machine.
- Soaking (Optional but Recommended): For particularly stubborn residue or to ensure thorough sanitization, you can soak removable parts in a solution of warm water and a food-grade sanitizer or a mild bleach solution (follow manufacturer recommendations for dilution ratios). Soak for the recommended time, typically 5-10 minutes.
- Scrubbing: Use a soft brush to meticulously scrub all surfaces of the removable parts, paying close attention to any crevices or areas where ingredients might have accumulated.
- Thorough Rinsing: Rinse all parts extensively to remove any trace of sanitizer or bleach.
- Sanitizing the Base: For compressor models, you can wipe down the interior of the base (where the bowl sits) with a sanitizing solution after ensuring the machine is unplugged. Never immerse the base of any ice cream maker in water.
- Drying: Again, meticulous drying is crucial. Allow all parts to air dry completely before reassembly.
Specific Maintenance Tips for Different Machine Types:
Freezer Bowl Models:
- Pre-Freezing the Bowl: Ensure your freezer is at its coldest setting (0°F/-18°C or lower). The bowl needs to be completely frozen solid. This can take anywhere from 8 to 24 hours, depending on your freezer’s efficiency and the bowl’s size. A partially frozen bowl will result in a slushy, poorly churned ice cream.
- Checking the Bowl for Cracks: Before each use, inspect the freezer bowl for any cracks or damage. A compromised bowl can leak coolant and render the machine unusable.
- Avoiding Scratches: When cleaning, use only soft cloths or sponges. Metal utensils or abrasive scrubbers can scratch the inner surface, potentially affecting its freezing efficiency and making it harder to clean.
Compressor Models:
- Airflow is Key: Compressor models generate heat. Ensure the ventilation grilles on the machine are unobstructed at all times. Avoid placing the machine in enclosed spaces or directly against walls.
- Dusting the Exterior and Grilles: Regularly dust the exterior of the machine and the ventilation grilles with a soft, dry cloth or a soft brush. Accumulated dust can impede airflow and cause the compressor to overheat, reducing its lifespan.
- Internal Cleaning (Rarely Needed): The internal components of compressor models are generally sealed. Unless your manual explicitly states otherwise, avoid attempting to clean the interior of the compressor unit.
Salt-and-Ice Models:
- Rust Prevention: These models often have metal components. After each use, thoroughly dry all parts to prevent rust. If you notice any signs of rust, gently scrub with a soft brush and a mild abrasive cleaner, then dry immediately.
- Thorough Rinsing: Ensure all salt residue is completely rinsed away. Salt can be corrosive.
- Lubrication (Occasional): Some older models might benefit from occasional lubrication of moving parts, but consult your manual before applying any lubricants.
Troubleshooting Common Issues:
- Ice Cream Not Freezing Properly:
- Freezer Bowl Models: Is the bowl frozen solid? Was it in the freezer long enough? Is your freezer at the correct temperature?
- Compressor Models: Is the machine running for the recommended time? Is the ambient temperature too high?
- All Models: Is the mixture too warm when you added it? Is the dasher rotating correctly? Are all components clean and dry?
- Machine Making Unusual Noises:
- Freezer Bowl Models: Is the bowl seated correctly? Is the dasher obstructed?
- Compressor Models: This could indicate a more serious mechanical issue. Consult your manual or contact customer support.
- Leaking: Check for cracks in the freezer bowl (if applicable) or ensure all seals are properly in place.
Storage: Protecting Your Investment
Proper storage will extend the life of your ice cream maker and prevent dust and debris from accumulating.
- Ensure Complete Dryness: Before storing, make absolutely certain all parts are bone dry.
- Reassemble (Optional): You can reassemble the machine loosely, or store parts separately in a clean, dry container or the original box.
- Choose a Cool, Dry Location: Store your ice cream maker in a cabinet or on a shelf away from direct sunlight, heat sources, and excessive moisture.
- Protect the Bowl: For freezer bowl models, store the bowl in a way that prevents it from being scratched or damaged.
Beyond Cleaning: Other Maintenance Considerations
- Motor Care: Most modern ice cream makers have sealed motors. Avoid getting water into the motor housing. If you notice any unusual smells or sounds from the motor, consult your manual.
- Cord and Plug Inspection: Periodically inspect the power cord and plug for any signs of damage, fraying, or exposed wires. Replace if damaged.
- Replacement Parts: Keep an eye on your dasher. If it shows signs of wear, cracking, or warping, it’s time to replace it to ensure optimal churning. Many manufacturers offer replacement parts.
By dedicating a little time and attention to maintaining your ice cream maker, you’ll be rewarded with consistently delicious frozen treats for years to come. A clean, well-cared-for machine is a happy machine, ready to churn out countless moments of frozen delight.
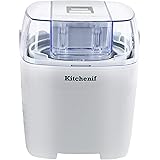
Kitchenif Digital Ice Cream Sorbet Slush & Frozen Yoghurt Maker Machine White 1.5 ltr (1.5 Ltr)
₹4,263.00 (as of May 5, 2026 13:51 GMT +05:30 - More infoProduct prices and availability are accurate as of the date/time indicated and are subject to change. Any price and availability information displayed on [relevant Amazon Site(s), as applicable] at the time of purchase will apply to the purchase of this product.)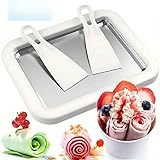
Vivart valley Instant Ice Cream Roll Maker Pan with 2 Scrapers – DIY Frozen Dessert Roller Plate for Homemade Ice Cream Rolls, Frozen Yogurt, Gelato & Cold Treats – Freezer Ice Cream Maker Tray
Now retrieving the price.
(as of May 5, 2026 13:51 GMT +05:30 - More infoProduct prices and availability are accurate as of the date/time indicated and are subject to change. Any price and availability information displayed on [relevant Amazon Site(s), as applicable] at the time of purchase will apply to the purchase of this product.)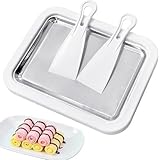
Havluxe Instant Ice Cream Roll Maker Machine | DIY Frozen Yogurt & Gelato Pan with 2 Scrapers | Non-Electric, 304 Stainless Steel Cold Plate for Homemade Rolled Cream Desserts
₹1,488.00 (as of May 5, 2026 13:51 GMT +05:30 - More infoProduct prices and availability are accurate as of the date/time indicated and are subject to change. Any price and availability information displayed on [relevant Amazon Site(s), as applicable] at the time of purchase will apply to the purchase of this product.)
Instant Ice Cream Roll Maker Machine | DIY Frozen Yogurt & Gelato Pan with 2 Scrapers | Non-Electric, 304 Stainless Steel Cold Plate for Homemade
Now retrieving the price.
(as of May 5, 2026 13:51 GMT +05:30 - More infoProduct prices and availability are accurate as of the date/time indicated and are subject to change. Any price and availability information displayed on [relevant Amazon Site(s), as applicable] at the time of purchase will apply to the purchase of this product.)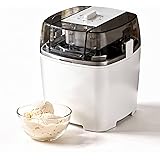
HOMEBASIC 1.5L Digital Ice Cream Maker Machine with Timer, Automatic Frozen Yogurt Sorbet Maker, Pre-Freeze Bowl, Compact Homemade Healthy Dessert Maker for Sorbet, Slush & Frozen Yoghurt (White)
₹3,999.00 (as of May 5, 2026 13:51 GMT +05:30 - More infoProduct prices and availability are accurate as of the date/time indicated and are subject to change. Any price and availability information displayed on [relevant Amazon Site(s), as applicable] at the time of purchase will apply to the purchase of this product.)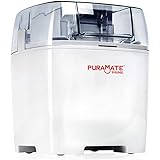
Puramate Prime Automatic Ice Cream Maker/Frozen Yoghurt Maker/Sherbet Slush Maker/Ice Cream Machine (1.5 Ltr)
₹2,499.00 (as of May 5, 2026 13:51 GMT +05:30 - More infoProduct prices and availability are accurate as of the date/time indicated and are subject to change. Any price and availability information displayed on [relevant Amazon Site(s), as applicable] at the time of purchase will apply to the purchase of this product.)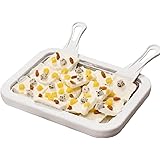
Ostin Instant Ice Cream Maker for Rolled Ice Cream Maker Machine with 2 Shovels, Frozen Yogurt Ice Cream Machine,Homemade Rolled Ice Cream
₹949.00 (as of May 5, 2026 13:51 GMT +05:30 - More infoProduct prices and availability are accurate as of the date/time indicated and are subject to change. Any price and availability information displayed on [relevant Amazon Site(s), as applicable] at the time of purchase will apply to the purchase of this product.)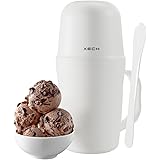
XECH Ice Cream Maker Machine for Home | Cordless Rechargeable Softy Ice Cream Machine for Kids & Family | Birthday Gift for Kids, Girls, Women, Men & Teachers | 400ml Bowl (Scoop)
₹1,499.00 (as of May 5, 2026 13:51 GMT +05:30 - More infoProduct prices and availability are accurate as of the date/time indicated and are subject to change. Any price and availability information displayed on [relevant Amazon Site(s), as applicable] at the time of purchase will apply to the purchase of this product.)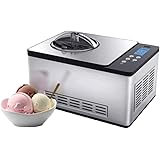
Whynter ICM-220CGY Automatic 2 Quart Capacity Stainless Steel Bowl & Yogurt Function, Built-in Compressor, no pre-freezing, LCD Digital Display, Timer, Stainless Steel-Ice Cream + Yogurt Maker
₹63,759.75 (as of May 5, 2026 13:51 GMT +05:30 - More infoProduct prices and availability are accurate as of the date/time indicated and are subject to change. Any price and availability information displayed on [relevant Amazon Site(s), as applicable] at the time of purchase will apply to the purchase of this product.)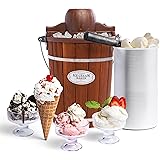
NOSTALGIA Bunn Nostalgia ICMP600WD Vintage Collection 6-Quart Wood Bucket Electric Ice Cream Maker with Easy-Clean Liner (Brown)
₹21,023.84 (as of May 5, 2026 13:51 GMT +05:30 - More infoProduct prices and availability are accurate as of the date/time indicated and are subject to change. Any price and availability information displayed on [relevant Amazon Site(s), as applicable] at the time of purchase will apply to the purchase of this product.)
KESHVAT Instant Rolled Ice Cream Maker Pan with 2 Spatulas – Stainless Steel DIY Ice Cream Roller Plate for Homemade Ice Cream Rolls, Frozen Yogurt, Gelato & Kids Dessert Making
₹799.00 (as of May 5, 2026 13:51 GMT +05:30 - More infoProduct prices and availability are accurate as of the date/time indicated and are subject to change. Any price and availability information displayed on [relevant Amazon Site(s), as applicable] at the time of purchase will apply to the purchase of this product.)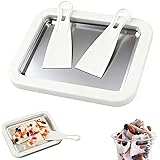
Rolled Ice Cream Maker, At-Home Rolled Ice Cream Machine with Instant Freeze Tray & 2 Scrapers,DIY Fun Family Activity Instant Ice Cream Maker for Yogurt, Sorbet (White)
Now retrieving the price.
(as of May 5, 2026 13:51 GMT +05:30 - More infoProduct prices and availability are accurate as of the date/time indicated and are subject to change. Any price and availability information displayed on [relevant Amazon Site(s), as applicable] at the time of purchase will apply to the purchase of this product.)
GNOLY Rolled Ice Cream Maker, At-Home Rolled Ice Cream Machine with Instant Freeze Tray & 2 Scrapers, DIY Fun Family Activity Instant Ice Cream Maker for Yogurt, Sorbet (1 Pcs)
₹999.00 (as of May 5, 2026 13:51 GMT +05:30 - More infoProduct prices and availability are accurate as of the date/time indicated and are subject to change. Any price and availability information displayed on [relevant Amazon Site(s), as applicable] at the time of purchase will apply to the purchase of this product.)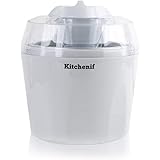
Kitchenif Ice Cream, Sorbet, Slush & Frozen Yoghurt Maker Machine Capacity White 1.5 ltr (1.5 Ltr)
₹3,663.00 (as of May 5, 2026 13:51 GMT +05:30 - More infoProduct prices and availability are accurate as of the date/time indicated and are subject to change. Any price and availability information displayed on [relevant Amazon Site(s), as applicable] at the time of purchase will apply to the purchase of this product.)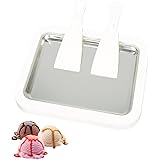
Instant Ice Cream Maker,Rolled Ice Cream Maker, Soft Serve Ice Cream maker,Perfect for Frozen Yogurt, and More! Food grade stainless steel ice cream roll machine for home us (white)
₹899.00 (as of May 5, 2026 13:51 GMT +05:30 - More infoProduct prices and availability are accurate as of the date/time indicated and are subject to change. Any price and availability information displayed on [relevant Amazon Site(s), as applicable] at the time of purchase will apply to the purchase of this product.)
Puthak 100 ml Manual Ice Cream Maker (Multicolor) - PTHK-8393
₹137.00 (as of May 5, 2026 13:51 GMT +05:30 - More infoProduct prices and availability are accurate as of the date/time indicated and are subject to change. Any price and availability information displayed on [relevant Amazon Site(s), as applicable] at the time of purchase will apply to the purchase of this product.)
HEONAY Rolled Ice Cream Maker Kit, DIY Ice Cream Roll Tray with 2 Scrapers, No Electricity Required, Stainless Steel Freezing Plate for Rolled Ice Cream, Frozen Yogurt, Sorbet
₹899.00 (as of May 5, 2026 13:51 GMT +05:30 - More infoProduct prices and availability are accurate as of the date/time indicated and are subject to change. Any price and availability information displayed on [relevant Amazon Site(s), as applicable] at the time of purchase will apply to the purchase of this product.)
Frozen Magic Cup Slush Maker | DIY Instant Ice Cream & Slush Cup | Reusable Squeeze Cup with Spoon Straw | Summer Drink Maker
Now retrieving the price.
(as of May 5, 2026 13:51 GMT +05:30 - More infoProduct prices and availability are accurate as of the date/time indicated and are subject to change. Any price and availability information displayed on [relevant Amazon Site(s), as applicable] at the time of purchase will apply to the purchase of this product.)
Instant Ice Cream Roll Maker, DIY Frozen Yogurt Pan with 2 Scrapers, for Homemade Rolled Gelato
Now retrieving the price.
(as of May 5, 2026 13:51 GMT +05:30 - More infoProduct prices and availability are accurate as of the date/time indicated and are subject to change. Any price and availability information displayed on [relevant Amazon Site(s), as applicable] at the time of purchase will apply to the purchase of this product.)
Slushy Maker Cups, DIY Magic Slushy Maker Squeeze Cups, Portable Smoothie Squeeze Cup for Juices, Milk and Ice Cream Make, Double Layers Silicone Slushie Cup with Straw for Friends,Family Gifts-green
₹579.00 (as of May 5, 2026 13:51 GMT +05:30 - More infoProduct prices and availability are accurate as of the date/time indicated and are subject to change. Any price and availability information displayed on [relevant Amazon Site(s), as applicable] at the time of purchase will apply to the purchase of this product.)