
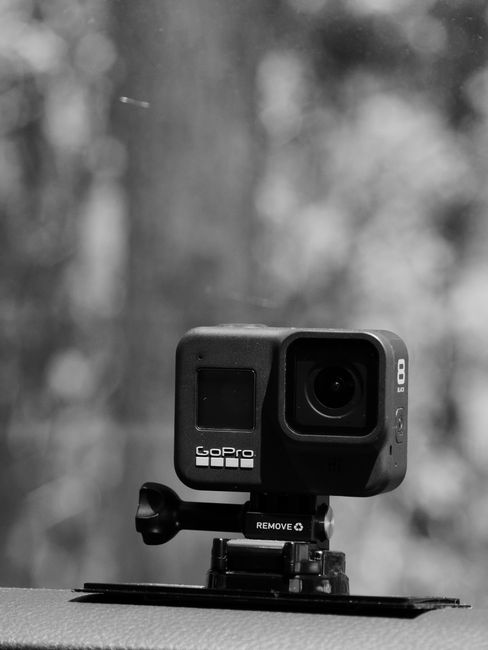
Unleash Your Story: Mounting Your Action Camera for Breathtaking Perspectives
Action cameras, with their rugged design and wide-angle lenses, are powerful tools for capturing life’s adventures. But raw footage, no matter how thrilling the activity, can fall flat without compelling visuals. The secret to unlocking stunning shots lies not just in the action itself, but in how you frame it. Mounting your action camera creatively is the key to transforming ordinary moments into cinematic masterpieces. This guide delves into a spectrum of innovative mounting techniques, empowering you to explore unique angles and elevate your storytelling.
The Foundation: Understanding Your Mounts and Their Potential
Before diving into creative angles, familiarize yourself with the core mounting options that come with most action cameras. These are your building blocks for cinematic expression:
- Adhesive Mounts (Flat & Curved): These are ubiquitous and incredibly versatile. Their strong adhesive allows attachment to almost any smooth, non-porous surface. The flat mount is ideal for helmets, car dashboards, or smooth metal panels, while the curved mount conforms to helmets, kayaks, or surfboards.
- Suction Cup Mounts: Perfect for smooth, flat surfaces like car windows, windshields, or even glass tables. They offer a strong, temporary hold and are easily repositionable.
- Clamp Mounts: These are your go-to for attaching to handlebars, poles, railings, or even straps. Their adjustable grip provides a secure and adaptable mounting solution.
- Chest Mounts: Offering a first-person perspective, the chest mount places the camera directly in front of your torso, mimicking your natural field of view. This is exceptional for capturing immersive experiences.
- Head Mounts/Helmet Mounts: Similar to the chest mount, these provide an immersive POV. Helmet mounts, in particular, are excellent for activities where you need your hands free and want to capture the direction of your gaze.
- Jaws Flex Clamp Mount: This highly adaptable mount features a flexible neck and a powerful clamp, allowing you to position your camera in virtually any orientation, even on uneven or irregular surfaces.
- Pole Mounts/Extension Poles: These extend your camera’s reach, enabling you to capture wider shots, self-shots with a better perspective, or get the camera into tight spaces.
Beyond the Obvious: Creative Mounting Strategies for Impactful Shots
Now, let’s explore how to leverage these mounts for truly captivating visuals.
1. The Immersive First-Person View (FPV) – Elevated:
While chest and head mounts are standard for FPV, consider variations to enhance the experience:
- Chin Mount (Helmet): For a slightly lower, more dynamic POV than a top-of-helmet mount, attach your camera to the underside of your helmet. This captures more of your body and the immediate foreground, adding a sense of visceral immersion.
- Side-Mounted Helmet: Experiment with mounting your camera to the side of your helmet. This offers a unique, almost voyeuristic perspective, capturing your peripheral vision and the environment as you turn your head. This can be particularly effective for capturing the dynamics of a race or a challenging trail.
- Goggle Mount: For activities like skiing or snowboarding, a small goggle mount can provide a compact and unobtrusive FPV that feels incredibly natural.
2. The Ground-Up Perspective: Adding Drama and Scale:
Looking up from ground level can create a sense of awe and emphasize the scale of your surroundings.
- Low-Angle Adhesive Mount (Ground Level): Stick an adhesive mount to the ground, a low rock, or a fallen log. This perspective will make your subject appear larger and more imposing, ideal for capturing a cyclist conquering a hill or a hiker amidst towering trees.
- Suction Cup Mount (Low on Vehicle): Attach a suction cup to the lower portion of a car door or bumper. This offers a dynamic, fast-paced view of the road and surrounding landscape, perfect for car chases or scenic drives.
- Jaws Flex Clamp (Roots or Rocks): Utilize the Jaws Flex Clamp to grip onto uneven surfaces like tree roots or jagged rocks. This allows for incredibly low, stable shots that emphasize texture and the natural environment.
3. The Dynamic Follow-Cam: Tracking Movement with Style:
Capturing movement is a hallmark of action videography. Creative mounting can turn a simple follow-cam into a narrative element.
- Rear-Facing Vehicle Mount: Position an adhesive or suction cup mount on the rear of your vehicle. This allows you to capture the receding landscape or the vehicle itself as it moves away, creating a sense of journey and departure.
- Side-Facing Vehicle Mount (Low): Mount the camera low on the side of your vehicle, pointing outwards. This captures the passing scenery and the motion of the car in a dynamic, almost cinematic way.
- Pole Mount (Behind You): Extend a pole mount behind you while walking or cycling. This creates a subtle, trailing perspective that emphasizes your movement through the environment without being overtly self-aware.
- Clamp Mount (On a Pet’s Harness): For a truly unique follow-cam, secure a clamp mount to a pet’s harness. This offers an adorable and often surprising perspective on your adventures from a furry friend’s point of view.
4. The Unexpected Vantage Points: Finding the Unseen Angles:
Think outside the box and explore less conventional mounting locations.
- Inside Objects: Mount your camera inside a backpack, a tent, or even a cooler. This offers a hidden, intimate perspective on the preparation and unfolding of your adventure.
- Underwater Mounts: If your camera is waterproof, explore mounting it on objects underwater. Think of attaching it to a rock on the seabed or even a piece of driftwood to capture the aquatic world from a unique vantage point.
- Ceiling/Overhead Mounts: In indoor settings or under structures, use adhesive or clamp mounts to position your camera overhead. This provides an unusual, almost God-like perspective, ideal for capturing the dynamics of a dance or a skateboarding trick.
- Jaws Flex Clamp (Unusual Objects): Grip the Jaws Flex Clamp onto seemingly random objects – a tree branch, a fence post, a railing – to create unexpected, artistic framing.
5. The Detail-Oriented Close-Up: Revealing the Finer Points:
Sometimes, the most compelling shots are those that focus on the intricate details of an activity.
- Pole Mount (Up Close): Use a short extension pole to get your camera incredibly close to the action, focusing on the exertion on an athlete’s face, the intricate mechanics of a tool, or the texture of a natural element.
- Clamp Mount (On Equipment): Clamp your camera onto a piece of equipment being used – a kayak paddle, a climbing rope, a bicycle crankset. This offers a highly specific and informative perspective on the mechanics of the action.
- Adhesive Mount (On the Action Itself): For certain activities, you might be able to temporarily affix an adhesive mount to a non-critical part of the equipment being used (e.g., a surfboard fin, a ski). This requires careful consideration for safety and equipment integrity.
Tips for Maximizing Your Creative Mounts:
- Test, Test, Test: Before embarking on a critical shoot, always test your mounts in the intended environment. Ensure they are secure and that the camera’s field of view is optimal.
- Consider Lighting: The angle of your camera will dramatically affect how light interacts with your subject and the environment. Experiment with different angles to capture the best natural light.
- Stabilization is Key: While action cameras have built-in stabilization, creative angles can sometimes exacerbate shakiness. Use a gimbal if possible, or practice smooth movements to ensure stable footage.
- Framing and Composition: Even with the most creative mount, good composition is crucial. Think about leading lines, the rule of thirds, and negative space to create visually appealing shots.
- Experiment with Speed: Combine creative mounting with different frame rates (e.g., slow-motion) to add another layer of visual interest.
- Think About the Narrative: What story are you trying to tell? Choose your mounting points to enhance that narrative and evoke the desired emotion.
- Safety First: Always prioritize safety. Ensure your mounts are secure and won’t detach during your activity, potentially causing damage or injury. Avoid mounting in positions that could obstruct your vision or impede your movement.
- Post-Production Power: Creative mounting is only half the battle. Learn to use editing software to enhance your footage, color grade, and add music to truly bring your vision to life.
By actively exploring these creative mounting techniques and embracing a spirit of experimentation, you can transform your action camera from a simple recording device into a powerful storytelling tool, capturing your adventures from perspectives that will leave your audience in awe.